Thursday, August 22, 2013

5 Months Old

Grant turned 5 months old yesterday and is still as cute as can be!
 
He is a very happy baby and is generous with his smiles and laughs, especially for his sisters.
 

We had kind of a rough week last week. He got his immunizations and they really kicked his butt. The girls have always been a little cranky but he was really feeling junky, poor guy!

I gave his hair a little trim yesterday. It was getting a little unruly.


He weighed 14.5 lbs last week. That's a little over a pound more than the girls weighed at 7 months!

Grammy and Grandpa were over for their weekly visit. It's so nice to have them here so often.


Sunday, August 18, 2013

Recipe Sunday: Slow Cooker BBQ Ribs

My dad's birthday was this week, so we made him a special meal when he and my mom came for their weekly visit. (It's so awesome to get weekly visits from grammy and grandpa!) My dad is a lover of ribs so I thought I'd try this slow cooker rib recipe I've had pinned for a while. We've never had a grill so I've never made ribs before but this was a delicious way to cook ribs without having your oven on all day. We also had a green salad, some pasta salad and pink lemonade--the perfect summer meal!

Easy Barbecued Ribs


4 lbs pork (baby) back ribs-leave the membrane on the ribs to help hold them together
3 tbsp sweet paprika
2 tbsp light brown sugar, lightly packed
1/8 tsp cayenne pepper
S&P to taste
2 cups barbecue sauce
Vegetable oil spray
In a small bowl, mix together paprika, brown sugar, cayenne and S&P. Rub this mixture all over both sides of your ribs well. Arrange ribs in the slow cooker by standing them up against the wall of the stoneware pot, thicker side down and meaty side against the pot. Pour barbecue sauce over the ribs, cover and cook for 6-8 hours on low. (My Crock Pot cooks really fast, so I did about 4 and a half.)
 
Once the initial slow cooking is done, very carefully (as they are very tender) remove the ribs to a baking pan which you have lined with foil and put a rack on (my dad used a turner in the center and I had tongs on each side to remove them), bone side up. Set to the side. Skim any fat that has risen to the top and strain all of the remaining juices from the slow cooker through a mesh strainer into a small saucepan. Bring to boil and allow to simmer and reduce by about a third, approximately 15 minutes. Put your oven’s broiler on to heat up and make sure that there is an oven rack about 10 inches below the broiler element. When the broiler is preheated, brush the ribs with sauce and broil for 3 or 4 minutes. Take them out and very carefully flip them over, brush with sauce and broil again, meat side up, for 4 minutes. Serve any remaining sauce on the side with the ribs.


For dessert, I made Schneeballen, which is a deep-fried pastry my dad fell in love with while on vacation in Germany this summer. Mine didn't look quite this pretty but they sure tasted delicious!

Tuesday, August 13, 2013

Little Bugs Preschool

Abby had her first day at the Little Bugs Preschool today. It's an adorable little school that a lady runs in her home. She is in the bumble bee class--Tuesdays and Thursdays from 8:30-11:30.
 
She was a little nervous but also excited.


Clara needed to get in on the action. She was pretty bummed not to go with Abby.


It took me a minute to realize that Clara was sitting up at the table playing. It was hard to get her to leave this fun place!


She has a fun day. She had lots to report but she says she didn't speak at all. This doesn't surprise me. One of the little girls in her class at church asked me, "Does Abby know how to talk?" Ha!

Here's Abby on her first day of the preschool co-op we did last year. Less than a year and she's grown up so much!


Saturday, August 10, 2013

Recipe Sunday: Baked Barley Risotto with Butternut Squash

I made a recipe with butternut squash this week, and while it was good, it made me remember how much I really like this recipe. I don't know about you but there is something about putting less-commonly used veggies in a dish that makes me feel good about myself. (Don't even get me started about the arugula I put in a pasta this week).  Go throw some squash in a recipe and see what it does for your self esteem.
 
Baked Barley Risotto with Butternut Squash


Ingredients

  • 2 tablespoons olive oil
  • 1 small butternut squash (about 11/2 pounds)—peeled, seeded, and cut into 1-inch pieces (about 3 cups) **SEE TIP**
  • 1/2 onion, finely chopped
  • kosher salt and black pepper
  • 1 cup pearl barley
  • 1/2 cup dry white wine
  • 3 cups low-sodium vegetable broth
  • 5 ounces baby spinach
  • 1/2 cup grated Parmesan (2 ounces), plus more for serving
  • 1 tablespoon unsalted butter

Directions

  1. Heat oven to 400° F. Heat the oil in a Dutch oven or large oven-safe saucepan over medium-high heat. Add the squash, onion, ¾ teaspoon salt, and ¼ teaspoon pepper and cook, stirring often, until the onion begins to soften, 4 to 6 minutes.
  2. Add the barley to the vegetables and cook, stirring, for 1 minute. Add the wine and cook, stirring, until evaporated, about 1 minute. Add the broth and bring to a boil; cover the pot and transfer it to oven. Bake until the barley is tender, 35 to 40 minutes.
  3. Stir in the spinach, Parmesan, and butter. Serve with additional Parmesan.

**TIP** Put your squash in the microwave for five minutes, turning halfway. It will be easier to peel, seed and cut!

Dance Class

Last Saturday, a dance studio nearby had a free, try out the classes day. I took Abby to try it out and she liked it so we decided to sign her up. She is in a jazz/ballet/tumbling class. She had her first class this week. There was only one other girl in the class and the teacher has an assistant so she got lots of one-on-one attention. It was really fun for me to watch her. I couldn't stop smiling at how cute she is. I hope she continues to enjoy it and will want to stick with dance for a while.


There is a cute little class before Abby's for kids Clara's age. We may put her in when the next session starts if we can fit it in the budget!

Wednesday, August 7, 2013

The Rest of the House

For some reason, Blogger doesn't want you to see the kid's bathroom, which is a shame, because it's really cute. Maybe I will have to dedicate a post to it another day.
 
The Master bathroom. As you can see in the mirror, it has some nice shelves for storage. It's been awesome having two bathrooms, especially since both of them are larger than our one bathroom in Philly.


The laundry area. The washer sounds like a spaceship is taking off when I use it but hey, at least it's not in the bathroom. I can actually open the dryer door without it hitting the toilet. (I know, I know, first world problems.)


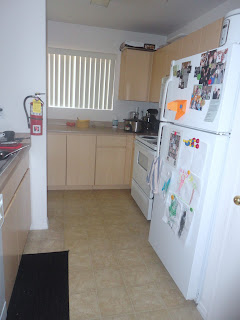
The kitchen. It's much more spacious than our kitchen in Philly, which is wonderful. I love that I can see what the kids are up to while I'm making dinner. (See those dirty dishes in the sink.)


Tuesday, August 6, 2013

The Bedrooms

We will continue our apartment tour with the bedrooms. I know, you can hardly stand the excitement...

Here is Grant's room.


Isn't the robot cute? It was a decoration from my baby shower.


It was hard for me to find free printables that I like but I finally found some good ones.


I fell in love with this bedding! His car seat cover is blue and orange too so I have have a thing for that color combo.


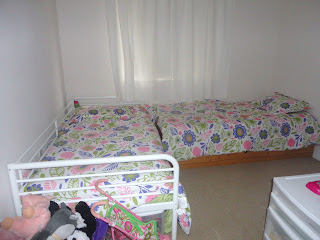
This is Abby and Clara's room. It's a little cramped but it works. I still want to make something to put over each of their beds--maybe something cute with their names or their silouettes. We shall see if I ever get around to it.


I still want a few more frames for this wall.


This is the busiest are of their room. Those drawer are full of art supplies and they are always making some sort of creations.


Here is my and Sam's room. It looks about the same as it has in every place we have lived.


We did finally get a bigger bed but not a bigger duvet, as you can see. It's another thing on the list.

Monday, August 5, 2013

New Pillows and a Tour

Last week, I decided to put our throw pillows in the wash, seeing as one of them was pretty well covered in baby spit-up. Unfortunately, one of the pillows exploded in the washing machine. I have been wanting to get new ones for a while but I couldn't find any that I liked that didn't cost a fortune. (Can someone explain to me why throw pillows are so expensive?) So, I decided I would make some.
 
The girls and I went to JoAnn and picked out some fabric. I was planning to do two different fabrics but all of the other ones I liked were dry clean only. No, thanks! I bought pillow forms, followed this tutorial for envelope pillow cases and Voila, new throw pillows that I love!
 

While I was taking a picture of the pillow, I realized I never posted pictures of our apartment. Whenever I thought about it, there was a fort or some other mess in the way. Plus, there are a few decorative projects I'd like to do still but who knows when I'll get around to it.

Here is the living room.


There is a little play area in the corner here. I can't wait to have a playroom someday!


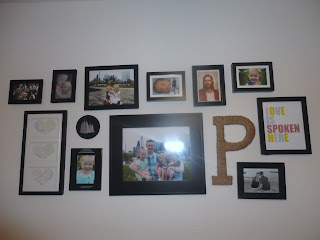
The photo wall. Some of the pictures like to go tipsy.


Here is the dining room.


The bookshelf.


I will finish the tour in another post (or two) so as to not overload you with pictures.

Sunday, August 4, 2013

Recipe Sunday: Thai Beef over Coconut Rice

 Thai Beef Over Coconut Rice
via Edesia's Notebook adapted by me
 

Ingredients:
1¼ cups rice
1 (13.5 oz.) can coconut milk
¾ cup water
½ tsp salt
2 tbsp soy sauce
1 tsp sugar
½ tsp red pepper flakes
¼ cup water
1 tsp cornstarch
1 tbs vegetable oil
3 garlic cloves, grated
1 lb. ground beef
Directions:
In a medium saucepan, combine rice, coconut milk, water, and salt. Cover and bring to a boil; reduce to a simmer, cover, and cook until rice is tender and liquid has been absorbed, about 25 minutes.


When rice is almost done, combine soy sauce, sugar, red pepper flakes, water, and cornstarch in a small bowl; stir until cornstarch is dissolved and set aside. Heat a cast-iron skillet or wok over high. Add oil and heat; add garlic. Cook, stirring constantly, 15 seconds. Add beef and cook, breaking up meat with a wooden spoon, until completely browned, about 4 minutes. Turn heat to high and add seasoning mixture. Cook 30 seconds, then turn heat down to low. Serve immediately over coconut rice.
Related Posts Plugin for WordPress, Blogger...