Tuesday, October 22, 2013

Another Carnival

It's been a while, my dear blog friends. I apologize. Things have been busy but mostly uneventful.
 
Last week, I took a quick trip to Utah for my Grandpa's funeral. I am now grandparentless, which is pretty sad. Luckily, I still have Sam's amazing grandma that I can claim. Sam took the day off while I was gone to stay home with the girls (I took Grant with me). While they were out having fun, they spotted the makings of a carnival but they couldn't tell if it was being taken down or set up.
 
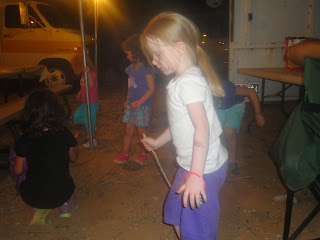
We saw it all set up on Saturday and since our previous plans for the night were cancelled we decided to fork out the big bucks and take the kids.
 
This carnival didn't have quite as many kid-friendly rides as the one in Philly did. And, it was set up in a dirt field, which made it slightly less enjoyable. Oh, the joys of living in the desert.
 
This ride was their favorite. The cars would go slow on the straight-aways and then whip around the curves. 
 

This picture was before the ride even started. Silly Abby.


Grant enjoyed looking at all the lights and people.


There was a little walk-through fun house that the girls weren't too sure about. The worker had to walk them through a few parts because they were a little stressed out.


Lucky for these adventurous girls, they will be at Knott's Berry Farms in just a few days.

Saturday, October 5, 2013

The Best Burp Cloths

I recently attended two baby showers for some of my high school friends. I knew I wanted to make something for their gifts so I decided to make them The Best Burp Cloths. When Abby was born, my sister-in-law made some of theses for me and then my friend Megan, in Philly, would make them for everyone. These burp cloths are made from cloth diaper so they are super absorbent. And, they are big! Some of the burp cloths I have had were so small they hardly covered my shoulder. It was like an open invitation to puke all down my back.
 
Of course, you could just use the cloth diaper as is but it's much more fun to jazz them up a bit. Since you're going to spend a lot of time with one on your shoulder, you might as well make it an accessory!
 
Here's how I made mine:
 
Start with some plain cloth diapers. Make sure you buy the pre-fold, 6-ply, like these.
 
 
 I got mine at Target but I know you can get them cheaper online. They also sell some fun, colored ones at JoAnn but they aren't quite as thick (they are lacking the absorbent pad in the center).
 

Cut out some fabric. I used snuggle flannel so they are extra soft to wipe baby's face. I cut mine 6 inches by 20 inches, give or take. This particular fabric was a scrap so it was a bit smaller.


Fold the edges under and pin. Don't worry if it's not perfectly straight. You won't be able to tell, especially after washing them a million times.


Iron down the edges to keep them secure.


Sew along the edges of the flannel. Use contrasting thread and/or a decorative stitch to give them a little something extra.


And there you have it. The Best Burp Cloths! My sister-in-law usually makes hers by sewing strips of ribbon down each side of the absorbent center. I thought about adding ric rac along the edges of the fabric but it seemed a little busy with my fabrics. Really though, the sky is the limit.


I made boy ones.


And girl ones.


I  made little bundles and tied them up with ric rac.

Wednesday, October 2, 2013

Sisterly Love

When I've gone to check on the girls the past few nights, this is how I have found them:


The first night, it startled me to see another body in Abby's bed.

They look so cute together but we've been moving Clara back to her bed in case they thrash about and kick and/or hit each other, as sleeping kids often do.

Last night, Clara was fussing  and when I went in to check on her, she was in Abby's bed. As I picked her up to put her back in her bed, Abby said, "No!" in her sleep. Even her sleeping brain didn't want me to take her sister away.

Despite occasional bickering, they really are the best of friends. I love watching them play together and I really love when they go off to entertain each other and give me a break.


Thursday, September 26, 2013

Daddy/Daughter Activity

Sam took the girls to a daddy/daughter activity. We had been talking about it all week and the girls were about to spontaneously combust when Friday afternoon rolled around. They were a bit naughty that day, so I kept threatening that they couldn't go if they were bad. (20 Awesome Parent Points for me!)
 

They started with a nature scavenger hunt. They were excited about all of the treasures they brought home.


Then, they had foil dinners. Sam said they turned out delicious so I can pat myself on the back for that.


They finished the night with S'mores, which I think was what the girls were most excited about.


Grant went to bed before 6 that night so I had a couple hours all to myself. I ate a bag of popcorn for dinner, painted my nails and read. It was wonderful.

Wednesday, September 25, 2013

Avocado

After a few days of rice cereal, we gave Grant some avocado. That was the first thing we gave both of the girls too. He wasn't too sure about it. He kept pulling the funiest faces and gagging.

 
He was still willing to give me some smiles though.


I gave it to him another day and he was a little more tolerant. Though I still don't think he's a big fan. I have since given him some squash and he loved it.

Sunday, September 15, 2013

Recipe Sunday: Macaroni and Cheese


I have made a lot of mac and cheese recipes. I try pretty much every one I come across. It's just the perfect comfort food and, of course, my kids love it. I've had a lot of good ones but this is my favorite one to make. It's simple and always turns out delicious. In fact, it's probably the most repeated recipe in my house.

Macaroni and Cheese
via Betty Crocker Sunday Dinner


Ingredients:
2 cups uncooked elbow macaroni
¼ cup butter
¼ cup flour
½ teaspoon salt
¼ teaspoon pepper
¼ teaspoon Worcestershire sauce
2 cups milk, cream, half and half (I just use whatever is in the fridge)
2 cups shredded cheddar cheese

I also love to add leftover ham and peas when we have it. Yum!

Directions: 
1. Heat oven to 350.
2. Cook macaroni as directed on package.
3. While macaroni is cooking, melt butter in large saucepan over low heat. Stir in flour, salt, pepper are Worcestershire sauce. Cook over low heat, stirring constantly, until mixture is smooth and bubbly; remove from heat.
4. Stir in milk. Heat to boiling, stirring constantly. Boil and stir 1 minute.
5. Stir in cheese. Cook, stirring occasionally, until cheese is melted.
6. Drain macaroni. Gently stir macaroni into cheese sauce. Pour into ungreased 2-quart casserole pan. Bake uncovered 20-25 minutes or until bubble.

Wednesday, September 11, 2013

A Taggie Blanket

My friend Laura, in Philly, made Taggie Blankets as her signature baby shower gift. When Grant's hands were getting a little spastic in bed, we started to give him the Taggie as a way to occupy his hands and keep him from knocking the pacifier out of his mouth. He has grown quite fond of the Taggie and likes to have it when he sleeps. I decided, at 3:30 a.m., when I do some of my best thinking, that I should make him another Taggie for the times when one is in the wash, or heaven forbid, one gets lost. (Wow, that was a run-on sentence!) I'm all about babies having something to soothe them, but I think it best to have more than one of that something. I know my own parents had some fun experiences with lost blankies.
 
I checked my fabric stash and found some I liked. Most of my ribbon is girlie so I loaded up the troops and went to JoAnn for some more.
 
I thought I'd document the process for your sheer enjoyment.
 
Taggie Blanket
 
What you'll need:
2 kinds of fabric, I used a minky and a snuggle flannel
assorted ribbon of different sizes and textures
pins
sewing machine
 
I started by cutting my fabric about 12x14 inches. I was using some leftover fabric so I was a bit limited on size.


Next, I cut my ribbon into 4 inch strips. I made 20 strips using 6 different ribbons. I wanted to keep it cheap so I used some ribbon I already had and bought a couple of new ones at JoAnn. (Check the dollar section. They had some cute two-spools packs for a buck!


Once all my ribbon was cut, I arranged it how I would put it on the blanket. I strayed from it a bit but I didn't want the same ribbon next to each other.


Fold a piece of ribbon in half.

 
Place each strip of ribbon between the fabric, right sides together and pin it in place. Pin it well! You don't want it coming lose.


Pin all of your strips between the fabric. It's a bit tedious, but the project is so easy otherwise! (This is just to show you what it looks like. When all the ribbon is in place, it should be hiding between the fabric.)


Sew around the outside leaving an opening of a few inches at one of the corners.


At the open corner, turn the blanket right side out.


Sew along the edge to close of your opening and to make sure all of the ribbons are nice and secure.


Ta da! So easy and inexpensive--a perfect gift for a friend or for your own little one.


I think it's safe to say that he likes it!


Related Posts Plugin for WordPress, Blogger...